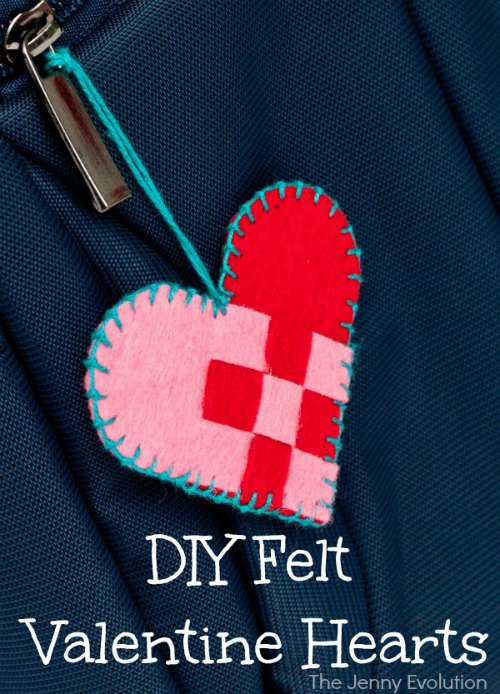
DIY Felt Valentine Hearts
Aren’t these felt Valentine hearts adorable?
Who doesn’t love adding a little bit of charm to their home around Valentine’s Day?
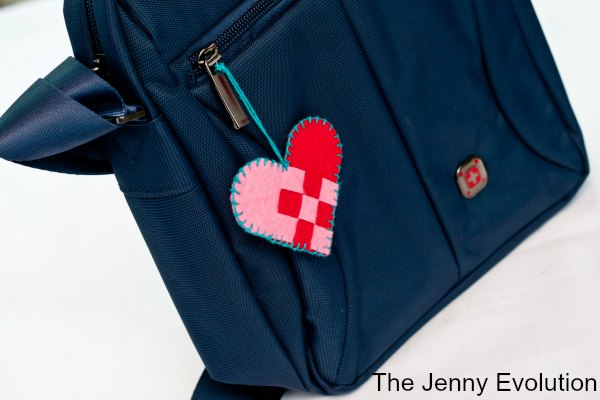
You can use these DIY felt Valentine hearts to spruce up your bags or decorate your place with.
And since Valentine’s Day is just around the corner, these weaved felt Valentine hearts are a perfect gift to your loved one (or yourself).
Be sure to check out these other fun Valentine activities and recipes.
This post contains affiliate links.
Step 1: Gather all the materials needed:
- Red and pink craft felt
- Sewing needle
- Crochet thread
- Scissors
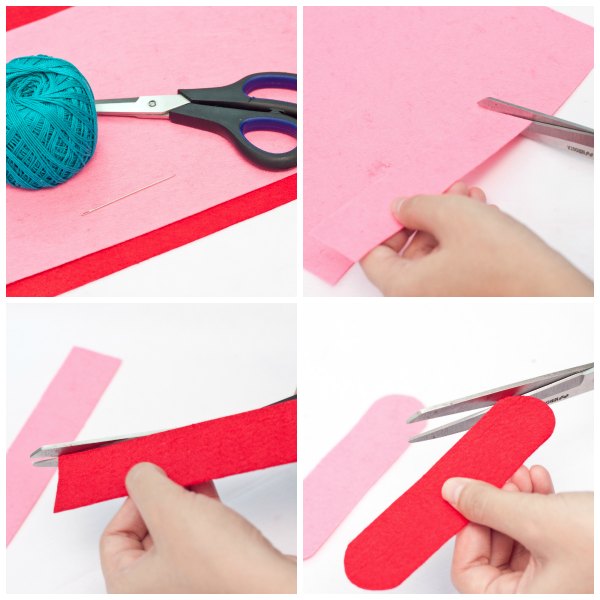
Step 2: Cut a pink rectangle that is 13 cm. by 4 cm. in dimension.
Step 3: Cut a rectangle with the same dimension as the pink felt.
Step 4: Curve all the sides of both pink and red felt.
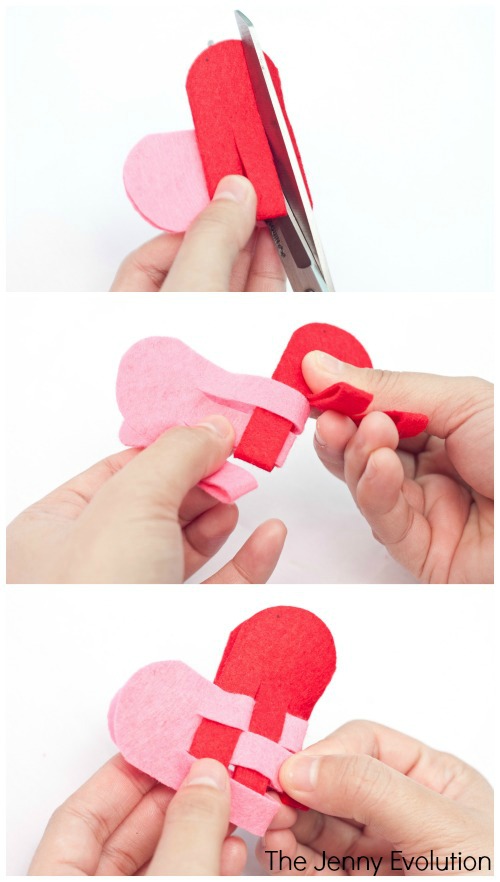
Step 5: Fold each rectangle and place it on top of the other.
Make sure that they are well aligned to form a heart.
Cut two (2) parallel lines on each of the felt rectangle, this is roughly 3.5 centimeters in length.
The cut should be made until the intersecting part of the other felt under it.
Love Sign Decoration Valentines Day Pillow Covers6 Pieces Valentine’s Day Heart Shape Wooden SignValentines Day Decor Table Runner


Do the same for the other felt below.
Step 6: Insert the first red strand to the loop of the first pink strand.
Loop the second pink strand on the first red strand loop.
Pull the first red strand and loop this on the third pink strand.
The colors for this should be alternate in order to be correct.
Step 7: For the second red strand now, loop the first pink strand on the second red strand, then loop the second red strand on the second pink strand.
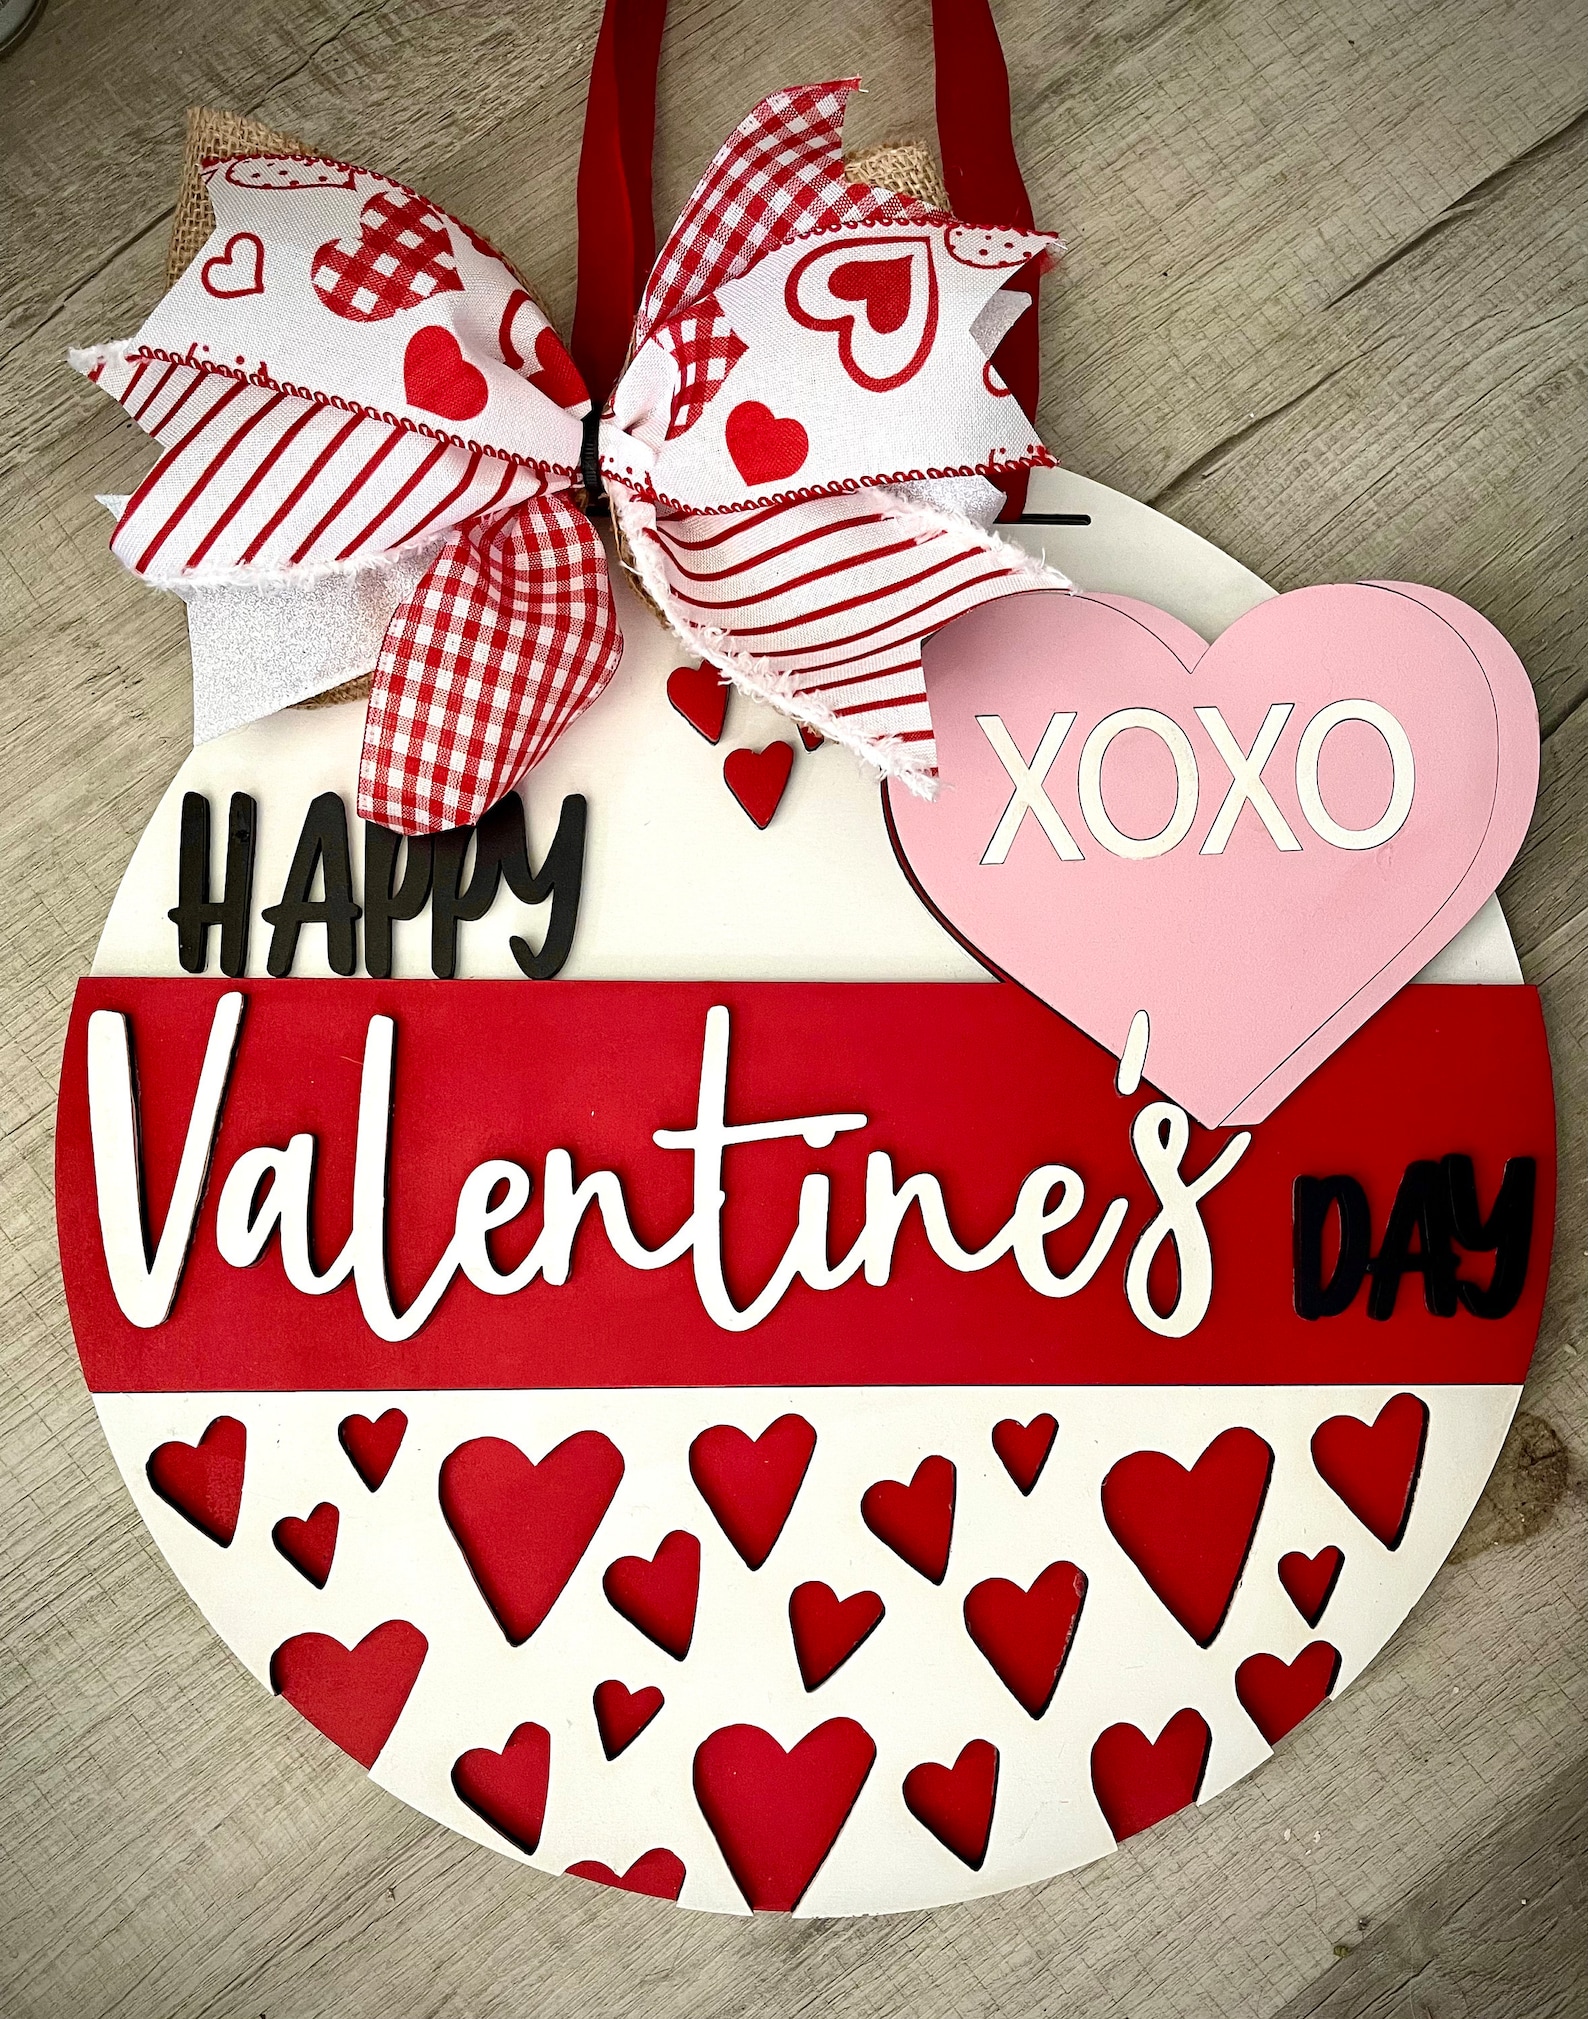
Welcome Heart Doormat Falling Hearts Valentine’s Outdoor Coir Door MatHappy Valentines Day Painted Door Hanger with Matching BowValentines Front Door Decor

Step 8: Loop the third pink strand on the second red strand in order to lock it.
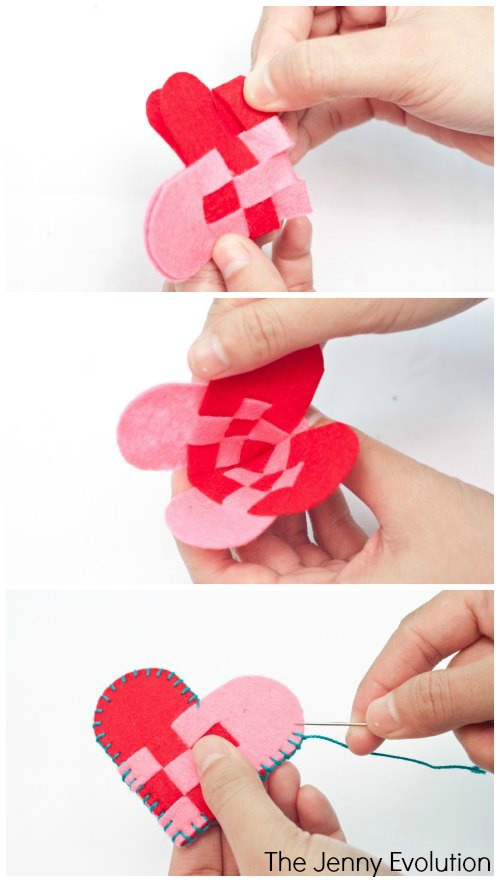
Step 9: Now for the third red strand, loop this on the extreme end of the first pink strand.
Insert the second pink strand to the loop end of the red strand.
Then, loop the extreme end of the third red strand on the extreme end of the third pink strand to lock it.
Step 10: Open the heart to check if everything is okay.
The insides should look like this.
Rustic Be My Valentine BannerBe My Valentine BannerValentine Heart SignDistressed Farmhouse Heart


Step 11: Sew the edge of the heart using a blanket stitch.
Step 12: Lock the end of the stitch and give an allowance to the thread before cutting it.
This will serve as the loop that can then secure to a bag, hang from a door knob or attach to a present.
This bag charm can also be used as a key chain.
All you have to do is place a key ring on it.
You can even add some designs to it — use different colors for a splash of fun.
So if you liked this, then go make one for yourself now or as a gift!
Printable Valentine Fun!
For more fun, these printable activities will add a dash of love and a lot of fun to your Valentine’s Day festivities.
This is so charming! I love the colors you chose.